Voice Typing in Windows 11 is a built-in feature that allows you to dictate text using your voice, eliminating the need for manual typing. This tool is particularly beneficial for users seeking hands-free interaction with their PC, whether for accessibility reasons or convenience. In this guide, we’ll walk you through the steps to set up and use Voice Typing effectively.
What Is Voice Typing in Windows 11?
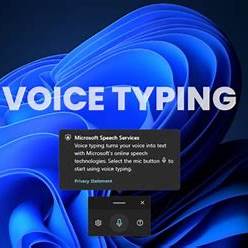
Voice Typing is Windows 11’s integrated speech-to-text functionality, enabling users to input text by speaking. It’s powered by Microsoft’s online speech recognition services and works across various applications where text input is possible, such as Notepad, Microsoft Word, web browsers, and more.
Prerequisites for Using Voice Typing
Before you begin, ensure the following:
- Internet Connection: Voice Typing relies on online speech recognition, so a stable internet connection is necessary.
- Microphone: A working microphone is required. This can be built-in or external.
- Language Settings: Ensure that your preferred language is set up for speech recognition.
How to Enable and Use Voice Typing
Step 1: Open a Text Input Field
Click on any area where you can type text, such as a document, search bar, or text field in an application.
Step 2: Activate Voice Typing
- Using Keyboard Shortcut: Press Windows + H keys simultaneously.
- Using Touch Keyboard: If you’re on a touchscreen device, tap the microphone icon next to the spacebar on the touch keyboard.
A small Voice Typing toolbar will appear on the screen.
Step 3: Start Dictating
Once the toolbar indicates it’s listening, begin speaking clearly. Your speech will be transcribed into text in real-time.
Step 4: Stop Dictating
To stop Voice Typing, you can:
- Click the microphone icon on the Voice Typing toolbar.
- Press Windows + H again.
Customizing Voice Typing Settings
Click the settings (gear) icon on the Voice Typing toolbar to access customization options:
- Auto Punctuation: Toggle this on to allow Windows to insert punctuation marks automatically based on your speech patterns.
- Voice Typing Launcher: Enable this to have the Voice Typing toolbar appear automatically when you click on a text field.
Supported Languages
Voice Typing supports multiple languages, including:
- English (United States, United Kingdom, Australia, Canada, India)
- French (France, Canada)
- German
- Spanish (Spain, Mexico)
- Chinese (Simplified, Traditional)
To switch languages:
- Click the language switcher on the taskbar.
- Press Windows + Spacebar to cycle through installed languages
Tips for Effective Voice Typing
- Speak Clearly: Articulate your words to improve recognition accuracy.
- Use Commands for Punctuation: Say “comma,” “period,” “question mark,” etc., to insert punctuation.
- Edit as Needed: Review the transcribed text and make corrections manually if necessary.
Troubleshooting Common Issues
- Voice Typing Not Activating: Ensure your microphone is connected and not muted. Check that online speech recognition is enabled in Settings > Privacy & security > Speech.
- Poor Recognition Accuracy: Background noise can affect performance. Try using a headset or moving to a quieter environment.
- Unsupported Language: Verify that your desired language is installed and set as the default input language.
Conclusion
Voice Typing in Windows 11 is a powerful tool that enhances productivity and accessibility. By following the steps outlined above, you can efficiently dictate text across various applications. Remember to speak clearly and utilize the customization options to tailor the experience to your needs.