Category: SOFTWARE

  • Windows Can’t Connect to Wi-Fi But Other Devices Can

    Windows Can’t Connect to Wi-Fi But Other Devices Can

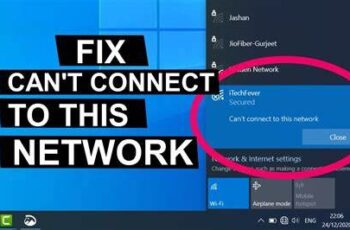
    It can be frustrating when your Windows PC can’t connect to Wi-Fi, even though other devices on the same network work fine. This problem usually points to issues specific to your Windows machine, such as software glitches, driver problems, or configuration errors. This article explains in detail how to diagnose and fix the issue, based on recent research and personal troubleshooting experience.

    Understanding the Problem

    When other devices connect fine but your Windows PC can’t, it indicates that:

    • The Wi-Fi network is working.
    • The router is functioning.
    • The issue is isolated to your Windows PC.

    Step 1: Restart Your PC and Router

    Start with the basics:

    • Restart your Windows PC.
    • Power cycle your router by unplugging it for 30 seconds and plugging it back in.

    This often clears temporary glitches affecting connectivity.

    Step 2: Forget and Reconnect to the Wi-Fi Network

    Sometimes saved network credentials become corrupted.

    • Click the Wi-Fi icon on the taskbar.
    • Right-click your Wi-Fi network and select Forget.
    • Reconnect by selecting the network and entering the password.

    This resets your connection profile.

    Step 3: Run the Windows Network Troubleshooter

    Windows has a built-in troubleshooter that can fix common network issues:

    • Open Settings > Network & Internet > Status.
    • Click Network troubleshooter.
    • Follow the prompts to detect and fix problems.

    This automated tool often identifies simple fixes.

    Step 4: Check Airplane Mode and Wi-Fi Adapter

    Ensure airplane mode is off and Wi-Fi adapter is enabled:

    • Click the action center icon (bottom right).
    • Verify Airplane mode is off.
    • Check that Wi-Fi is turned on.
    • Open Device Manager (press Windows + X).
    • Expand Network adapters.
    • Right-click your Wi-Fi adapter and select Enable if disabled.

    Step 5: Update Wi-Fi Drivers

    Outdated or corrupted drivers can prevent Wi-Fi connections.

    • Open Device Manager.
    • Right-click your Wi-Fi adapter and select Update driver.
    • Choose Search automatically for updated driver software.
    • If Windows doesn’t find a new driver, visit your PC manufacturer’s website to download the latest.

    I often found that updating drivers resolved connectivity issues.

    Step 6: Reset Network Settings

    Resetting network settings can fix misconfigurations:

    • Open Settings > Network & Internet > Advanced network settings.
    • Click Network reset.
    • Click Reset now and confirm.
    • Your PC will restart.

    This removes and reinstalls network adapters and resets settings.

    Step 7: Check IP Configuration

    Incorrect IP settings can block internet access:

    • Open Command Prompt as administrator.
    • Run the following commands one by one:
      • ipconfig /release
      • ipconfig /renew
      • ipconfig /flushdns

    This refreshes your IP and clears DNS cache.

    Step 8: Disable VPN or Security Software Temporarily

    Sometimes VPNs or firewalls interfere with network access.

    • Temporarily disable any VPN or security software.
    • Try reconnecting to Wi-Fi.
    • If this fixes the problem, adjust software settings or contact support.

    Step 9: Change DNS Settings

    Switching to a public DNS can help:

    • Open Settings > Network & Internet > Wi-Fi > Hardware properties.
    • Scroll to IP settings and click Edit.
    • Set to Manual and enable IPv4.
    • Enter DNS addresses like Google’s DNS:
      • Preferred: 8.8.8.8
      • Alternate: 8.8.4.4
    • Save and test connection.

    Step 10: Disable Power Management for Wi-Fi Adapter

    Windows may turn off the adapter to save power:

    • Open Device Manager.
    • Right-click your Wi-Fi adapter > Properties.
    • Go to Power Management tab.
    • Uncheck Allow the computer to turn off this device to save power.
    • Click OK.

    This prevents unexpected disconnections.

    Step 11: Check Router Settings

    Although other devices connect, router settings like MAC filtering may block your PC:

    • Access your router’s admin panel (usually via 192.168.1.1 or 192.168.0.1 in browser).
    • Check if MAC filtering is enabled.
    • If yes, add your PC’s MAC address or disable filtering.

    Step 12: Create a New Network Profile

    Sometimes the existing profile is corrupted.

    • Open Command Prompt as admin.
    • Run netsh wlan show profiles to list Wi-Fi profiles.
    • Run netsh wlan delete profile name=”YourNetworkName” to delete the problematic profile.
    • Reconnect to the network to create a fresh profile.

    Step 13: Check for Windows Updates

    Microsoft often releases fixes for network problems:

    • Open Settings > Windows Update.
    • Click Check for updates.
    • Install any available updates and restart.

    Conclusion

    When Windows can’t connect to Wi-Fi but other devices can, the issue usually lies in your PC’s network settings, drivers, or configuration. Following these steps systematically—starting from basic restarts to advanced driver updates and network resets—will help you resolve the problem effectively.

  • how to upgrade from windows 10 to windows 11 for free

    how to upgrade from windows 10 to windows 11 for free

    Windows 11 is Microsoft’s latest operating system, bringing a fresh design, improved performance, and enhanced security features. If you’re still using Windows 10, you might be wondering how to upgrade from Windows 10 to Windows 11 for free. The good news is that Microsoft allows eligible users to upgrade without any cost, provided their system meets the minimum requirements.

    In this guide, we’ll walk you through everything you need to know about upgrading from Windows 10 to Windows 11 for free, including system requirements, the upgrade process, and troubleshooting tips.

    System Requirements for Windows 11

    Before you upgrade, ensure that your PC meets the minimum system requirements set by Microsoft. Here’s what you need:

    • Processor: 1 GHz or faster with at least two cores on a compatible 64-bit processor.
    • RAM: At least 4 GB.
    • Storage: 64 GB or more.
    • TPM (Trusted Platform Module) Version 2.0.
    • Graphics: DirectX 12-compatible graphics card.
    • Display: High-definition (720p) display greater than 9 inches diagonally.
    • Internet Connection: Required for updates and some features.

    To check if your PC meets these requirements, Microsoft provides a free PC Health Check tool that can quickly determine compatibility.

    How to Check If Your PC Is Eligible for Windows 11

    Follow these steps to check if your PC is eligible for a free Windows 11 upgrade:

    1. Download the PC Health Check tool from the official Microsoft website.
    2. Install and run the tool.
    3. Click Check Now to analyze your system.
    4. If your PC is eligible, you’ll see a message saying, This PC meets Windows 11 requirements.
    5. If your PC is not eligible, the tool will provide details on what needs to be upgraded.

    How to Upgrade from Windows 10 to Windows 11 for Free

    If your PC meets the system requirements, you can follow these methods to upgrade from Windows 10 to Windows 11 for free.

    Method 1: Upgrade via Windows Update

    1. Backup Your Data: Before upgrading, back up important files to an external drive or cloud storage.
    2. Open Windows Update: Go to Settings > Update & Security > Windows Update.
    3. Check for Updates: Click Check for Updates to see if Windows 11 is available.
    4. Download and Install: If the update is available, click Download and Install.
    5. Restart Your PC: Once the installation is complete, restart your computer to finalize the upgrade.

    Method 2: Upgrade Using the Windows 11 Installation Assistant

    If Windows Update does not show the upgrade, you can manually install it using Microsoft’s Windows 11 Installation Assistant.

    1. Download the Installation Assistant: Visit Microsoft’s official website and download the Windows 11 Installation Assistant.
    2. Run the Assistant: Open the downloaded file and follow the on-screen instructions.
    3. Begin Installation: Click Accept and Install to start the upgrade.
    4. Restart When Prompted: Your PC will restart several times during the process.

    Method 3: Upgrade Using a Bootable USB or ISO File

    For a clean installation, you can use a bootable USB drive or an ISO file.

    1. Download the Media Creation Tool: Go to Microsoft’s official Windows 11 download page.
    2. Create Installation Media: Follow the prompts to create a bootable USB drive or ISO file.
    3. Boot from USB: Restart your PC and boot from the USB drive.
    4. Install Windows 11: Follow the on-screen instructions to complete the clean installation.

    Troubleshooting Common Issues During Upgrade

    Some users might face issues while upgrading. Here are solutions to common problems:

    Issue 1: “This PC Can’t Run Windows 11”

    • Ensure that TPM 2.0 and Secure Boot are enabled in the BIOS settings.
    • Update your BIOS to the latest version from your manufacturer’s website.

    Issue 2: Insufficient Storage

    • Delete unnecessary files or use Disk Cleanup to free up space.
    • Consider using an external drive for additional storage.

    Issue 3: Installation Stuck

    • Restart your PC and try again.
    • Disconnect any external devices that may be causing conflicts.

    Benefits of Upgrading to Windows 11

    Once you successfully upgrade from Windows 10 to Windows 11 for free, you’ll gain access to several new features, including:

    • Modern UI: A cleaner, more user-friendly interface.
    • Snap Layouts: Improved multitasking with multiple windows.
    • Better Performance: Optimized for speed and battery life.
    • Enhanced Security: TPM 2.0 and Secure Boot provide better protection.
    • Android App Support: Run Android apps directly on Windows.

    Conclusion

    Upgrading from Windows 10 to Windows 11 for free is a simple process if your PC meets Microsoft’s system requirements. Whether you choose to upgrade via Windows Update, Installation Assistant, or a bootable USB, following the right steps ensures a smooth transition. If you run into any issues, troubleshooting common problems can help you resolve them quickly. Enjoy the enhanced performance and new features of Windows 11!

    If you found this guide helpful, share it with others who may also be looking to upgrade from Windows 10 to Windows 11 for free!


  • How to Change Dark Mode in Windows 11

    How to Change Dark Mode in Windows 11

    Dark mode has become a popular feature among Windows users, offering a sleek, eye-friendly interface that reduces eye strain and enhances battery life on laptops. If you’re wondering how to change the dark mode in Windows 11, this guide will walk you through the process step by step. Whether you want to enable, customize, or schedule dark mode, we’ve got you covered.

    Why Use Dark Mode in Windows 11?

    Before we get into how to change dark mode in Windows 11, let’s explore some of its benefits:

    • Reduces Eye Strain – Dark mode reduces blue light exposure, making it easier on the eyes, especially in low-light environments.
    • Improves Battery Life – On OLED and AMOLED screens, dark mode consumes less power, extending battery life.
    • Looks Aesthetically Pleasing – Many users prefer the sleek, modern look of dark mode over the traditional light theme.

    Now, let’s get started with enabling dark mode in Windows 11.

    How to Enable Dark Mode in Windows 11

    Turning on dark mode in Windows 11 is simple and can be done in just a few steps:

    1. Open Settings – Press Win + I to open the Settings app.
    2. Go to Personalization – Click on Personalization from the left sidebar.
    3. Select Colors – Scroll down and click on Colors.
    4. Choose Dark Mode – Under the “Choose your mode” section, select Dark from the dropdown menu.

    Once you do this, Windows 11 will immediately switch to dark mode, applying the theme to system apps, settings, and other UI elements.

    How to Customize Dark Mode in Windows 11

    If you want more control over dark mode settings, Windows 11 allows customization:

    1. Enable Dark Mode for Apps Only

    If you prefer a mix of dark and light themes, you can apply dark mode only to apps while keeping system elements light:

    1. Go to Settings > Personalization > Colors.
    2. Under “Choose your mode,” select Custom.
    3. Choose Light for “Windows mode” and Dark for “App mode”.

    This way, system elements like the taskbar and Start menu stay light, while apps use dark mode.

    2. Enable Dark Mode for System UI Only

    Alternatively, if you want the taskbar and Start menu in dark mode while keeping apps in light mode:

    1. Go to Settings > Personalization > Colors.
    2. Choose Custom under “Choose your mode”.
    3. Select Dark for “Windows mode” and Light for “App mode”.

    This setting is ideal for users who like a darker interface but prefer a light background in apps.

    3. Change Accent Colors

    To personalize dark mode further, you can adjust accent colors:

    1. Open Settings > Personalization > Colors.
    2. Scroll down to Accent color and pick a color of your choice.
    3. Enable Show accent color on Start and taskbar if you want the color to appear in these areas.

    Accent colors add a personal touch to your dark mode experience.

    How to Schedule Dark Mode in Windows 11

    Windows 11 doesn’t have a built-in dark mode scheduler, but you can use third-party apps like “Auto Dark Mode” or manually set up a schedule using Task Scheduler.

    Using Auto Dark Mode (Recommended)

    1. Download Auto Dark Mode from the Microsoft Store.
    2. Install and open the app.
    3. Set your preferred times for switching between light and dark mode.
    4. Auto Dark Mode will automatically change your theme based on the schedule.

    Using Task Scheduler (Manual Method)

    If you prefer not to install third-party apps, you can use Task Scheduler:

    Step 1: Create a Task for Dark Mode

    1. Open Task Scheduler (search “Task Scheduler” in the Start menu).
    2. Click Create Basic Task on the right.
    3. Name it Enable Dark Mode and click Next.
    4. Set a trigger time (e.g., 7:00 PM for dark mode) and click Next.
    5. Select Start a program and click Next.
    6. Type powershell.exe in the “Program/script” box.
    7. In “Add arguments,” enter:
      New-ItemProperty -Path HKCU:\SOFTWARE\Microsoft\Windows\CurrentVersion\Themes\Personalize -Name AppsUseLightTheme -Value 0 -Type Dword -Force
    8. Click Finish.

    Step 2: Create a Task for Light Mode

    Repeat the same steps but name it Enable Light Mode and schedule it for the morning (e.g., 7:00 AM). In step 7, change the PowerShell command’s value to 1 instead of 0.

    This will automatically switch your Windows 11 theme between dark and light modes based on the schedule.

    How to Enable Dark Mode in Microsoft Edge and Other Apps

    Some apps have independent dark mode settings. Here’s how to enable dark mode in popular apps:

    Microsoft Edge

    1. Open Microsoft Edge.
    2. Click the three-dot menu in the top-right corner and select Settings.
    3. Go to Appearance.
    4. Under “Theme,” select Dark.

    Google Chrome

    1. Open Google Chrome.
    2. Click the three-dot menu in the top-right corner and select Settings.
    3. Go to Appearance.
    4. Enable Dark Mode.

    File Explorer

    File Explorer follows the system-wide dark mode setting, but you can change folder colors by using third-party themes.

    Microsoft Office

    1. Open Microsoft Word, Excel, or PowerPoint.
    2. Click File > Options.
    3. Under “General,” find the Office Theme section.
    4. Select Dark Gray or Black.

    How to Disable Dark Mode in Windows 11

    If you want to revert to light mode:

    1. Open Settings > Personalization > Colors.
    2. Under “Choose your mode,” select Light.

    This will switch your system and apps back to the default light theme.

    Conclusion

    Learning how to change dark mode in Windows 11 allows you to customize your experience for better aesthetics, reduced eye strain, and improved battery life. Whether you want to enable, customize, or schedule dark mode, Windows 11 offers several options to fit your needs. With this guide, you can easily switch between themes and optimize your system for comfort and efficiency.

  • How to Install Linux in Windows

    How to Install Linux in Windows

    If you’re looking to enhance your computing experience or explore the world of open-source software, installing Linux alongside Windows is a great way to start. Whether you’re a beginner or an experienced user, this guide will walk you through the process of installing Linux in Windows step-by-step. By the end of this article, you’ll have a functional Linux operating system ready to use.


    Why Install Linux in Windows?

    Linux is known for its security, flexibility, and open-source nature. It offers a wide range of distributions, such as Ubuntu, Fedora, and Debian, to cater to various user needs. By installing Linux in Windows, you can:

    1. Dual-boot your system: Run both operating systems on the same computer and switch between them as needed.
    2. Explore new software: Linux has its own ecosystem of applications and tools.
    3. Boost performance: Linux is lightweight and can rejuvenate older systems.
    4. Learn something new: For tech enthusiasts, Linux offers an opportunity to delve into system customization and open-source development.

    Prerequisites

    Before we dive into the steps, here’s what you’ll need:

    1. A Windows PC: Ensure you have enough disk space for Linux installation.
    2. A USB drive (at least 8GB): This will be used to create a bootable Linux installer.
    3. A Linux ISO file: Download the desired Linux distribution from its official website.
    4. A tool to create bootable USB drives: Tools like Rufus or Etcher are ideal.
    5. Backup your data: Always back up important files before making major changes to your system.

    Steps to Install Linux in Windows

    1. Choose a Linux Distribution

    The first step is selecting the right Linux distribution. Popular options include:

    • Ubuntu: User-friendly and widely supported.
    • Fedora: Great for developers and tech enthusiasts.
    • Linux Mint: Ideal for Windows users transitioning to Linux.

    Visit the official website of your chosen distribution and download the ISO file.

    2. Create a Bootable USB Drive

    1. Insert your USB drive into the Windows PC.
    2. Download and install a tool like Rufus.
    3. Open Rufus and select your USB drive.
    4. Click on “SELECT” and choose the Linux ISO file you downloaded.
    5. Under “Partition scheme,” select GPT (for UEFI) or MBR (for BIOS).
    6. Click “START” to create the bootable USB drive.

    3. Prepare Your Windows System

    1. Free up disk space: Open Disk Management (search for “Disk Management” in the Start menu) and shrink a partition to create unallocated space for Linux (at least 20GB is recommended).
    2. Disable Fast Startup: Go to Control Panel > Power Options > Choose what the power button does > Change settings that are currently unavailable, and uncheck “Turn on fast startup.”
    3. Backup your data: Ensure all important files are safely stored on an external drive or cloud storage.

    4. Boot into the Linux Installer

    1. Restart your computer and enter the BIOS/UEFI settings (usually by pressing a key like F2, F12, DEL, or ESC during startup).
    2. Change the boot order to prioritize the USB drive.
    3. Save changes and restart your computer. It should boot into the Linux installer.

    5. Install Linux in Windows

    1. Select the option to Try Linux or Install Linux from the boot menu.
    2. Follow the on-screen instructions:
      • Choose your language and keyboard layout.
      • Connect to a Wi-Fi network if prompted.
    3. When you reach the partitioning step, choose Install alongside Windows or Something Else to manually partition the disk:
      • Allocate space for the root partition (/), swap space, and optionally a home partition (/home).
    4. Proceed with the installation and set up your user credentials.
    5. Once the installation is complete, restart your computer.

    6. Configure the Bootloader

    After installation, you’ll see a boot menu (GRUB) when you start your computer. This menu allows you to choose between Linux and Windows. If you don’t see it, you may need to:

    1. Boot into BIOS/UEFI and ensure the Linux bootloader is prioritized.
    2. Use a boot repair tool (like Boot-Repair) to fix any issues.

    Post-Installation Tips

    Update Your System

    Open the terminal in Linux and run the following commands:

    sudo apt update
    sudo apt upgrade

    Replace apt with your package manager if you’re not using a Debian-based distribution.

    Install Additional Software

    Explore the Linux software repositories for essential applications like:

    • VLC Media Player
    • LibreOffice
    • GIMP
    • Visual Studio Code

    Learn Basic Linux Commands

    Familiarize yourself with basic commands to navigate and manage your system. For example:

    • ls: List files and directories.
    • cd: Change directory.
    • sudo: Execute commands with administrative privileges.

    Troubleshoot Common Issues

    • No boot menu: Use the BIOS/UEFI settings to prioritize the Linux bootloader.
    • Wi-Fi not working: Install additional drivers using the terminal.
    • System crashes: Check compatibility and update your kernel.

    Benefits of Installing Linux in Windows

    By installing Linux in Windows, you’re not only gaining access to a robust and secure operating system but also diversifying your computing environment. You can:

    • Experiment with different distributions.
    • Use Linux for development tasks while retaining Windows for gaming or proprietary software.
    • Explore advanced features like virtual desktops, shell scripting, and server hosting.

    Conclusion

    Installing Linux in Windows is a rewarding experience that opens up a world of possibilities. By following this step-by-step guide, you can seamlessly dual-boot both operating systems and enjoy the best of both worlds. Whether you’re a tech enthusiast, developer, or just curious about Linux, this setup provides a flexible and secure computing environment.

    So, why wait? Download your preferred Linux distribution today and get started with installing Linux in Windows!