Category: Tech

  • How to Install Linux in Windows

    How to Install Linux in Windows

    If you’re looking to enhance your computing experience or explore the world of open-source software, installing Linux alongside Windows is a great way to start. Whether you’re a beginner or an experienced user, this guide will walk you through the process of installing Linux in Windows step-by-step. By the end of this article, you’ll have a functional Linux operating system ready to use.


    Why Install Linux in Windows?

    Linux is known for its security, flexibility, and open-source nature. It offers a wide range of distributions, such as Ubuntu, Fedora, and Debian, to cater to various user needs. By installing Linux in Windows, you can:

    1. Dual-boot your system: Run both operating systems on the same computer and switch between them as needed.
    2. Explore new software: Linux has its own ecosystem of applications and tools.
    3. Boost performance: Linux is lightweight and can rejuvenate older systems.
    4. Learn something new: For tech enthusiasts, Linux offers an opportunity to delve into system customization and open-source development.

    Prerequisites

    Before we dive into the steps, here’s what you’ll need:

    1. A Windows PC: Ensure you have enough disk space for Linux installation.
    2. A USB drive (at least 8GB): This will be used to create a bootable Linux installer.
    3. A Linux ISO file: Download the desired Linux distribution from its official website.
    4. A tool to create bootable USB drives: Tools like Rufus or Etcher are ideal.
    5. Backup your data: Always back up important files before making major changes to your system.

    Steps to Install Linux in Windows

    1. Choose a Linux Distribution

    The first step is selecting the right Linux distribution. Popular options include:

    • Ubuntu: User-friendly and widely supported.
    • Fedora: Great for developers and tech enthusiasts.
    • Linux Mint: Ideal for Windows users transitioning to Linux.

    Visit the official website of your chosen distribution and download the ISO file.

    2. Create a Bootable USB Drive

    1. Insert your USB drive into the Windows PC.
    2. Download and install a tool like Rufus.
    3. Open Rufus and select your USB drive.
    4. Click on “SELECT” and choose the Linux ISO file you downloaded.
    5. Under “Partition scheme,” select GPT (for UEFI) or MBR (for BIOS).
    6. Click “START” to create the bootable USB drive.

    3. Prepare Your Windows System

    1. Free up disk space: Open Disk Management (search for “Disk Management” in the Start menu) and shrink a partition to create unallocated space for Linux (at least 20GB is recommended).
    2. Disable Fast Startup: Go to Control Panel > Power Options > Choose what the power button does > Change settings that are currently unavailable, and uncheck “Turn on fast startup.”
    3. Backup your data: Ensure all important files are safely stored on an external drive or cloud storage.

    4. Boot into the Linux Installer

    1. Restart your computer and enter the BIOS/UEFI settings (usually by pressing a key like F2, F12, DEL, or ESC during startup).
    2. Change the boot order to prioritize the USB drive.
    3. Save changes and restart your computer. It should boot into the Linux installer.

    5. Install Linux in Windows

    1. Select the option to Try Linux or Install Linux from the boot menu.
    2. Follow the on-screen instructions:
      • Choose your language and keyboard layout.
      • Connect to a Wi-Fi network if prompted.
    3. When you reach the partitioning step, choose Install alongside Windows or Something Else to manually partition the disk:
      • Allocate space for the root partition (/), swap space, and optionally a home partition (/home).
    4. Proceed with the installation and set up your user credentials.
    5. Once the installation is complete, restart your computer.

    6. Configure the Bootloader

    After installation, you’ll see a boot menu (GRUB) when you start your computer. This menu allows you to choose between Linux and Windows. If you don’t see it, you may need to:

    1. Boot into BIOS/UEFI and ensure the Linux bootloader is prioritized.
    2. Use a boot repair tool (like Boot-Repair) to fix any issues.

    Post-Installation Tips

    Update Your System

    Open the terminal in Linux and run the following commands:

    sudo apt update
    sudo apt upgrade

    Replace apt with your package manager if you’re not using a Debian-based distribution.

    Install Additional Software

    Explore the Linux software repositories for essential applications like:

    • VLC Media Player
    • LibreOffice
    • GIMP
    • Visual Studio Code

    Learn Basic Linux Commands

    Familiarize yourself with basic commands to navigate and manage your system. For example:

    • ls: List files and directories.
    • cd: Change directory.
    • sudo: Execute commands with administrative privileges.

    Troubleshoot Common Issues

    • No boot menu: Use the BIOS/UEFI settings to prioritize the Linux bootloader.
    • Wi-Fi not working: Install additional drivers using the terminal.
    • System crashes: Check compatibility and update your kernel.

    Benefits of Installing Linux in Windows

    By installing Linux in Windows, you’re not only gaining access to a robust and secure operating system but also diversifying your computing environment. You can:

    • Experiment with different distributions.
    • Use Linux for development tasks while retaining Windows for gaming or proprietary software.
    • Explore advanced features like virtual desktops, shell scripting, and server hosting.

    Conclusion

    Installing Linux in Windows is a rewarding experience that opens up a world of possibilities. By following this step-by-step guide, you can seamlessly dual-boot both operating systems and enjoy the best of both worlds. Whether you’re a tech enthusiast, developer, or just curious about Linux, this setup provides a flexible and secure computing environment.

    So, why wait? Download your preferred Linux distribution today and get started with installing Linux in Windows!
  • How to Remove Bloatware From Your Xiaomi Device

    How to Remove Bloatware From Your Xiaomi Device

    TeamWin Recovery Project or prominently known as TWRP, is a GUI-based custom recovery. It is open-source, actually. You can use it for your Android devices. It does have ouch-based UI, flash customs ROMS with MODs, Magisk, Supersu. It offers full system backup.

    Before the installation-

    The phone’s battery should be 60% and above.

    Back up your data on other devices or give an android backup.

    Install ADB on the PC/Laptop.

    Install Fastboot Drivers on the PC/Laptop.

    Download the recent Xiaomi USB drivers at your pc or lappy.

    Download twrp-3.4.0.-9.img it to the ADB- Fastboot driver’s extricated folder.

    Install an unlocked bootloader in your Xiaomi MI 10 5G

    How can I install TWRP in my Xiaomi MI 10 5G?

    • Install an unlocked bootloader in Xiaomi MI 10 5G at first.
    • Now it’s time to connect your phone with the PC and turn on the OEM unlock from the developer’s settings.
    • Extract ADB and Fastboot drivers and switch on the Powershell by pressing (Shift Key+Right Click).
    • The following command is needed to place the device into reboot through fastboot mode.

    ADB reboot bootloader

    • Put the twrp-3.4.0.-9.img in the file of drivers of ADB Fastboot.
    • Flash the TWRP image by using fastboot flash recoverytwrp-3.4.0-0.im
    • Reboot the phone with the command fastboot reboot
    • Some bugs can be here as it is unofficial. Not to lose any data, just have a backup beforehand.

    READ | 9 Best Apple Watch Games Worth Your Attention

    How can we root Xiaomi MI 10 5G

    1. If TWRP installation was done a long time ago, you need to give a full backup to your phone. Otherwise, you don’t need a full backup if it has been done recently.
    2. Press the upper volume button and the power button to restart your phone into TWRP recovery while turning on your phone.
    3. Search for the Magisk.zip file after installing and if you get it, just tap on it. Tap on ‘Swipe to confirm flash.’
    4. Install once again to locate the file ‘no-verity-force-encrypt.zip’ and select it. Again, do click on the option ‘Swipe to confirm flash.’
    5. After rebooting the system from TWRP recovery, you will be able to see the Magisk app on your phone, which will show your device’s root status.
    6. To ensure yourselves, just install a root checker from the play store and install.

    These are all about installing TWRP recovery and rooting Xiaomi MI 10 5G. Thanks for visiting the content.

  • 9 Best Apple Watch Games Worth Your Attention

    9 Best Apple Watch Games Worth Your Attention

    Apple watches are not only used for keep tracking on regular activities but also they are used to play games. There are a large number of exciting apple watch games. So here goes some name of the games:

    Tiny Armies:

    This game falls under the category of ‘Strategy games’. Those who love to play strategy games, this game is for them. Swiping gestures are quite simple here. It has the mode called ‘solo play’. Mountains and lakes are introduced here.

    Pocket Bandit:

    This game is a paid one. It has the wonderful feature of ‘gameplay’. This theme o this game is to steal valuables, jewel, money etc. but the twist comes in the presence of monitoring devices to resist theft.

    Bubblegum Hero:

    It’s a free and fun game. Filling of bubble is the main theme of the game. Tapping and holding are required in this game.

    Wordie:

    It’s also a free and fun game. A word which is common to four images is to be found mainly in this game. It seems simple in the beginning but as levels get increased it becomes more difficult to find that common word.

    Rules!

    It’s a puzzle game which gives one fun. It makes one’s brain to exercise. Certain rules must be followed in this game. As the level grows this game grows harder.

    Chess:

    It’s a popular brain game all over the world and it’s available on Apple watch also. This game can be played against players all over the world as well as against computer. It’s a free game and a leaderboard is maintained here.

    Lifeline 2:

    This a game based on a story. It’s the continuation after ‘Lifeline’ series. It’s like ‘timecrest’ but here it has an original content and the graphics is better. This game is a paid one.

    Jupiter Attack:

    This game will take anyone into the space. In this game, one has to drive the space ship and has to go against all the odds including enemies whose main target is to destroy the earth.

    Octopuz:

    This is a memory game where one’s brain cells will get exercised. This game goes with a timer and one has to replicate a pattern within the time.

  • 5 Best Duplicate Photo Finder and Cleaner Tools for Mac 2019

    5 Best Duplicate Photo Finder and Cleaner Tools for Mac 2019

    Are you wondering why your PC is so full of space and is barely left with any? Don’t worry, you are not alone. Many people are facing this problem due to the duplication of Photos that are on your PC. This is common in Mac users. So for them, we have here 5 Best Duplicate Photo Finder and Cleaner tools for Mac.

    Duplicate Photo Fixer Pro

    The most trusted Duplicate Photo Finder for Mac users. It is also a very easy to use Tool. Its scanning speed is good and it gives the result in a very organised manner so that there is no confusion for the user. The only problem is that it is not free, and does not provide any free trial.

    Gemini 2

    Many Mac users have used Gemini 2 and they do not regret it. This app is best known for its wide range and speed of scanning the device. One more thing it provides is that you can recover your photos and documents from this Duplicate Photo Finder so even if you need any again, you can get them back. The only problem is that it takes too much space.

    Easy Duplicate Finder

    As the name suggests, this Duplicate Finder is easy to use and has a very simple interface. It is best known for its backup system which can backup photos no matter how old they are. It supports PNG, JPEG, BMP and GIF formats. Other than photos it also can find and remove videos. But the problem is its speed as it takes almost an hour to delete all the duplicate files.

    PhotoSweeper X

    PhotoSweeper X is another app that is used by many Mac users and is well-trusted by all. This tool not only clears the duplicates and sort the pictures but also auto-locks the pictures. You can even change the position of the photo if you want through PhotoSweeper X only.

    Disk Drill

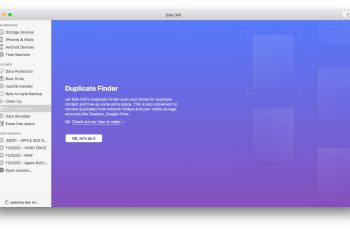
    We all know what a drill is right? So you might also know what the name suggests. This is another free and trusted Duplicate Photos Cleaner. Although I won’t say easy to use as it is pretty complicated for beginners to use. It can also find other types of documents too and clear their duplicates.

    So these are the 5 best Duplicate Photo Finder and cleaners for Mac. Many of them are paid so I suggest wisely choosing.

  • Great E Book Reader Apps for Android

    Great E Book Reader Apps for Android

    Books are the best ways one can utilize their free time most efficiently. E books should be selected in such a way that it meets the desires and needs of an individual. Here goes six best e book reading apps for android:

    Amazon kindle:

    Kindle is the most well known among all the free e book reading apps. Through this app one can get access to a large number of book materials, different magazines, etc. It provides features like making own notes, highlighting words and any other information, choosing preferable font, searching on most trending books etc.

    Wattpad:

    This app is the simplest one among the others especially for the beginners both who want to write and who want to read. Writers can get their publishers here. To make it more convenient, here e books are divided into 20 categories. The best feature of it is that it can sync over the whole device so that books could be picked up from anywhere.

    Nook:

    This app is among the few apps which really has a physical book location. Barnes & Noble, Nook’s parent company can be visited. This e book reader is standardized. It supports different format of books like the comic books, newspapers and magazines. It also comes with the syncing anywhere option.

    Kobo:

    This e book comes with the special feature called “Reading life” where one can get connected with a community sharing the common passion where one can have discussion on books, quotes etc. with the community friends. There is also a night mode enhancing the facility for reading during night.

    Google Play Books:

    It comes with the feature of supporting different book formats like- format of comic books. In this app books can be uploaded in cloud so that it becomes readable anywhere. It has certain features like giving bookmarks, skim mode etc. This app is also free of cost but here certain books charge money.

    Aldiko Book Reader:

    This app is one of the oldest e book reading apps among the other. It has very simple options which are convenient for the users. It has somewhat old interface, customized options, supporting phones and tabs. The free version contains ads but the paid version doesn’t.

  • 5 Best Photo Noise Reduction Software for Photography Lovers

    5 Best Photo Noise Reduction Software for Photography Lovers

    Who doesn’t love Noise reduction when it comes to photos. Especially when it is about Photography lovers, and they hate Noise in a Photo. So just for the sake of all these Photography lovers, here we have 5 Best Photo Noise cancellation or reduction Software.

    Krisp – AI noise cancellation

    Krisp is an HD Noise reduction and cancellation software. It is also known for AI voice production. It has features like background noise killing and even audio editing if you want, So it is also an Audio editor. The free version is good but with an HD version of $5 per month, it is unbeatable.

    Topaz Deonise AI

    Topaz is the most famous and used Noise cancellation software in the industry. It gives many options to edit areas where you want to remove the voice and where to not even deletes digital voice disturbance. It also gives some options for editing videos a little bit. But what makes its use less is its cost as it costs $79.99.

    Lightroom

    Adobe Lightroom is a video and audio editor which even helps in voice reduction and cancellation in the background, it even gives options to edit the audio digitally so that you can manage the radiopacity and luminance of audio. For mobile it is free but the package in the Adobe package is $9.99 per month.

    Photoshop

    Adobe Photoshop is the best photo editor in the world which even helps the reduction of Noise. It almost uses the same algorithm as Lightroom as it is made by the same company. It provides many tools like a mask, cancels, deletes, edits,s, etc. for audio. Now like lightroom, it is also included in the Adobe photo package of cost $9.99 per month.

    Noiseware

    Noiseware is the only software on this list that is only made for Noise cancellation and nothing else as the others are also used for other things. It is also an easy-to-use software for all the users even if you are using something like this for the first time. It is an extension to photoshop so it is free to add and use.

    So these are the most used Noice reduction software for Photos. If you are a photography lover then these will help you a lot.

  • 10 Best Battery Saver Apps for Android

    10 Best Battery Saver Apps for Android

    No matter which phone you use, as time passes, they get drained quickly even if it was above 60% charged when you started. This is mostly because of the heavy apps you have in your Android which takes battery in the background. For this problem, we have these 10 best Battery Saver apps for your Android.

    Avast Battery Saver

    Avast Battery Saver is a very easy-to-use and famous Battery saver for your android. One thing it exceeds is that it takes suggestions from the feedback from their users to update it. They also have a smart direct Battery saver switch off/on.

    Kaspersky Battery Life

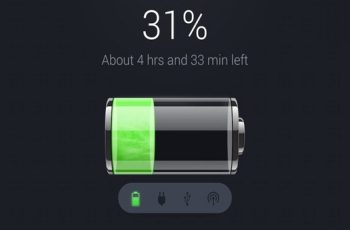
    Kaspersky Battery Saver is one of the best Battery savers for any android. It is best known for providing information about your phone while using, when will the battery end, apps that are taking a lot of battery, etc.

    Greenify

    Greenify’s users only speak for it as it has over 500 million users on Android only as it is also available on iOS. It is best in detecting apps running in the background and even which are active. It suggests you close these apps immediately if they take too much battery. It even helps you clean the phone.

    Battery Doctor

    It is another great Battery saver for any model of Android. It is famous all over the world as it supports 28 languages and has an easy-to-use interface. This app also can be turned off/on with just a button. Also, it helps you optimize apps that take too much battery.

    Battery Guru

    As the name suggests, it is a Guru. It is no Battery booster but something that keeps your battery high by itself. It has various modes which prevent wastage of battery and power. It also has this Doze mode which makes an interface where only particular apps are usable.

    Yellow Battery Saver

    This battery saver is the most lightweight and optimizable app for any mobile. After the Battery dropped from 30%, it does not have to be turned on by a button but gets on work itself. It also gives a 50% chance of killing all the apps that take too much battery.

    Green Battery

    Another Battery saver named after color but works great. It has different levels of battery saving for you to use as per need. Standard version for currently running apps and can be turned on/off by you, but Advanced version is for all the apps no matter where they are running.

    AccuBattery

    AccuBattery is just like the name, accurate the battery pretty well. It automatically runs during charging and keeps checking on every app you open and every app you opened. It puts many conditions like low battery, frequent use of heavy apps, etc. for keeping the phone in check.

    McAfee Mobile Security

    McAfee, although being a Mobile security app, has modes that even help us in saving the battery of your phone, and considering its popularity, you can surely try it.

    One Booster

    Last but not least. One booster is best known for the track it keeps on devices. And we can see that in its interface only where it shows the number of hours the app is gonna work. And also act accordingly.

    So these are the best Battery saver for Android out there and most of them are free so you can surely try them.


  • 10 Best Online Cloud Backup & Storage Services

    10 Best Online Cloud Backup & Storage Services

    Backup and storage facilities are the need of the hour. In this age where everything works online, a good backup is nothing short of a safe and secure measure.

    Now, looking for a good one is a challenge, but we have got it covered for you. So, here we shall discuss the best online cloud backup & storage services.

    Best online Cloud Backup & Storage Services:

    1.  pCloud:

    The first in the list comes the pCloud. It comes with the encryption levels to enhance the security.

    2. Icedrive:

    Icedrive is an online application that works under an algorithm named Twofish. It’s highly secure and encrypted application that proves to be a good backup for its users.

    3. IDrive:

    IDrive comes next in our list for backup and storage facilities. Its best part is its cheap and provides a good user interface. Also, it has a multitude of features.

    4. Microsoft OneDrive:

    Microsoft isn’t far behind in the race. It has got its own backup and storage facility called OneDrive. It provides free storage up to 5 GB and offers loads of features.

    5. SolarWinds:

    SolarWinds is known for its reliability and utility. You can manage the cloud storage facility with just a single dashboard. Also, it can deal with large apps too.

    6. Polarbackup:

    Polarbackup is a privacy and GDPR compliant cloud backup solution. Its backup facility is good enough to store files forever. Besides, it has the feature of automatic backups.

    7. Google Drive:

    Google Drive needs no introduction. It’s obviously the most common application used by people for backup and storage facilities.

    8. IDrive:

    This application is a bit different in that it helps in ensuring mobile, Linux and disk image backup too. Also, you get a dedicated dashboard to make things easier.

    9. Backblaze:

    If you need a tool that is secure and encrypted well, then Backblaze is your ally. It is highly encrypted and allows you to regulate scheduled backups.

    10. Dropbox:

    Dropbox is an alternative to Google Drive and serves the purpose well. It is a cloud-based backup service that comes in handy to store a wide range of files and products.

    Final Words:

    To sum up, cloud-based backup and storage facilities are common. The tools above are the best online cloud backup & storage services.