Unleash the Power of Linux on Windows: A Detailed Guide to Installing and Using WSL (April 2025)
The Windows Subsystem for Linux (WSL) is a fantastic feature that allows you to run a Linux environment directly on your Windows 10 or Windows 11 machine without the need for a separate virtual machine or dual booting. Whether you’re a developer, a system administrator, or simply a Linux enthusiast, WSL provides a convenient way to access Linux tools and commands within your familiar Windows environment. I’ve personally found WSL incredibly useful for various development tasks and exploring the Linux ecosystem. This guide will walk you through the step-by-step process of installing and using WSL on both Windows 10 and 11 as of April 2025.
Step 1: Checking Prerequisites and Enabling WSL (Windows 10 & 11)
Before you can install WSL, you need to ensure your system meets the basic requirements and enable the feature.
- Check Your Windows Version:
- Windows 10: WSL is available on 64-bit versions of Windows 10. For the best experience, ensure you are running version 1607 or later. You can check your version by typing “winver” in the Start Menu search bar and pressing Enter.
- Windows 11: WSL is readily available on all versions of Windows 11.
- Enable the WSL Feature: You can enable WSL using either PowerShell or the “Turn Windows features on or off” interface.
- Using PowerShell (Recommended for Simplicity):
- Open PowerShell as Administrator. Search for “PowerShell” in the Start Menu, right-click it, and select “Run as administrator.”
- Using PowerShell (Recommended for Simplicity):
- For WSL 2 (Recommended for Performance): Run the command: wsl –install
- This command will automatically enable the necessary WSL features and install a default Ubuntu distribution. You might be prompted to restart your computer.
- For WSL 1 (If you have specific compatibility needs): First, enable the core WSL feature by running: Enable-WindowsOptionalFeature -Online -FeatureName Microsoft-Windows-Subsystem-Linux
- Press Y if prompted to restart. After restarting, you can then install a Linux distribution (see Step 2).
- For WSL 2 (Recommended for Performance): Run the command: wsl –install
- Using “Turn Windows features on or off”:
- Search for “Turn Windows features on or off” in the Start Menu and open it.
- Scroll down the list and check the box next to “Windows Subsystem for Linux.”
- If you plan to use WSL 2 (recommended), also check the box next to “Virtual Machine Platform.”
- Click “OK.” You will be prompted to restart your computer.
As of April 2025, WSL 2 is generally recommended for most users due to its improved performance and full Linux kernel. The wsl –install command simplifies the process significantly on both Windows 10 and 11.
Step 2: Installing a Linux Distribution (Windows 10 & 11)
Once WSL is enabled, you can install your preferred Linux distribution from the Microsoft Store.
- Open the Microsoft Store: Search for “Microsoft Store” in the Start Menu and open it.
- Search for “Linux”: In the Microsoft Store search bar, type “Linux” and press Enter.
- Choose Your Distribution: You will see a list of available Linux distributions, such as Ubuntu, Debian, Kali Linux, SUSE Linux Enterprise Server, and more. Select the distribution you want to install. Ubuntu is a popular choice for beginners due to its large community and extensive documentation.
- Click “Get” or “Install”: On the distribution’s page, click the “Get” or “Install” button. The distribution files will be downloaded and installed on your system.
- Launch Your Linux Distribution: Once the installation is complete, you can launch your Linux distribution by searching for its name (e.g., “Ubuntu”) in the Start Menu and clicking on the application.
The first time you launch your chosen Linux distribution, it will likely take a few minutes to initialize and set up your user account. You will be prompted to create a username and password for your Linux environment.
Step 3: Basic Usage of the Linux Environment (Windows 10 & 11)
Once your Linux distribution is installed and running, you can start using it just like you would on a native Linux system.
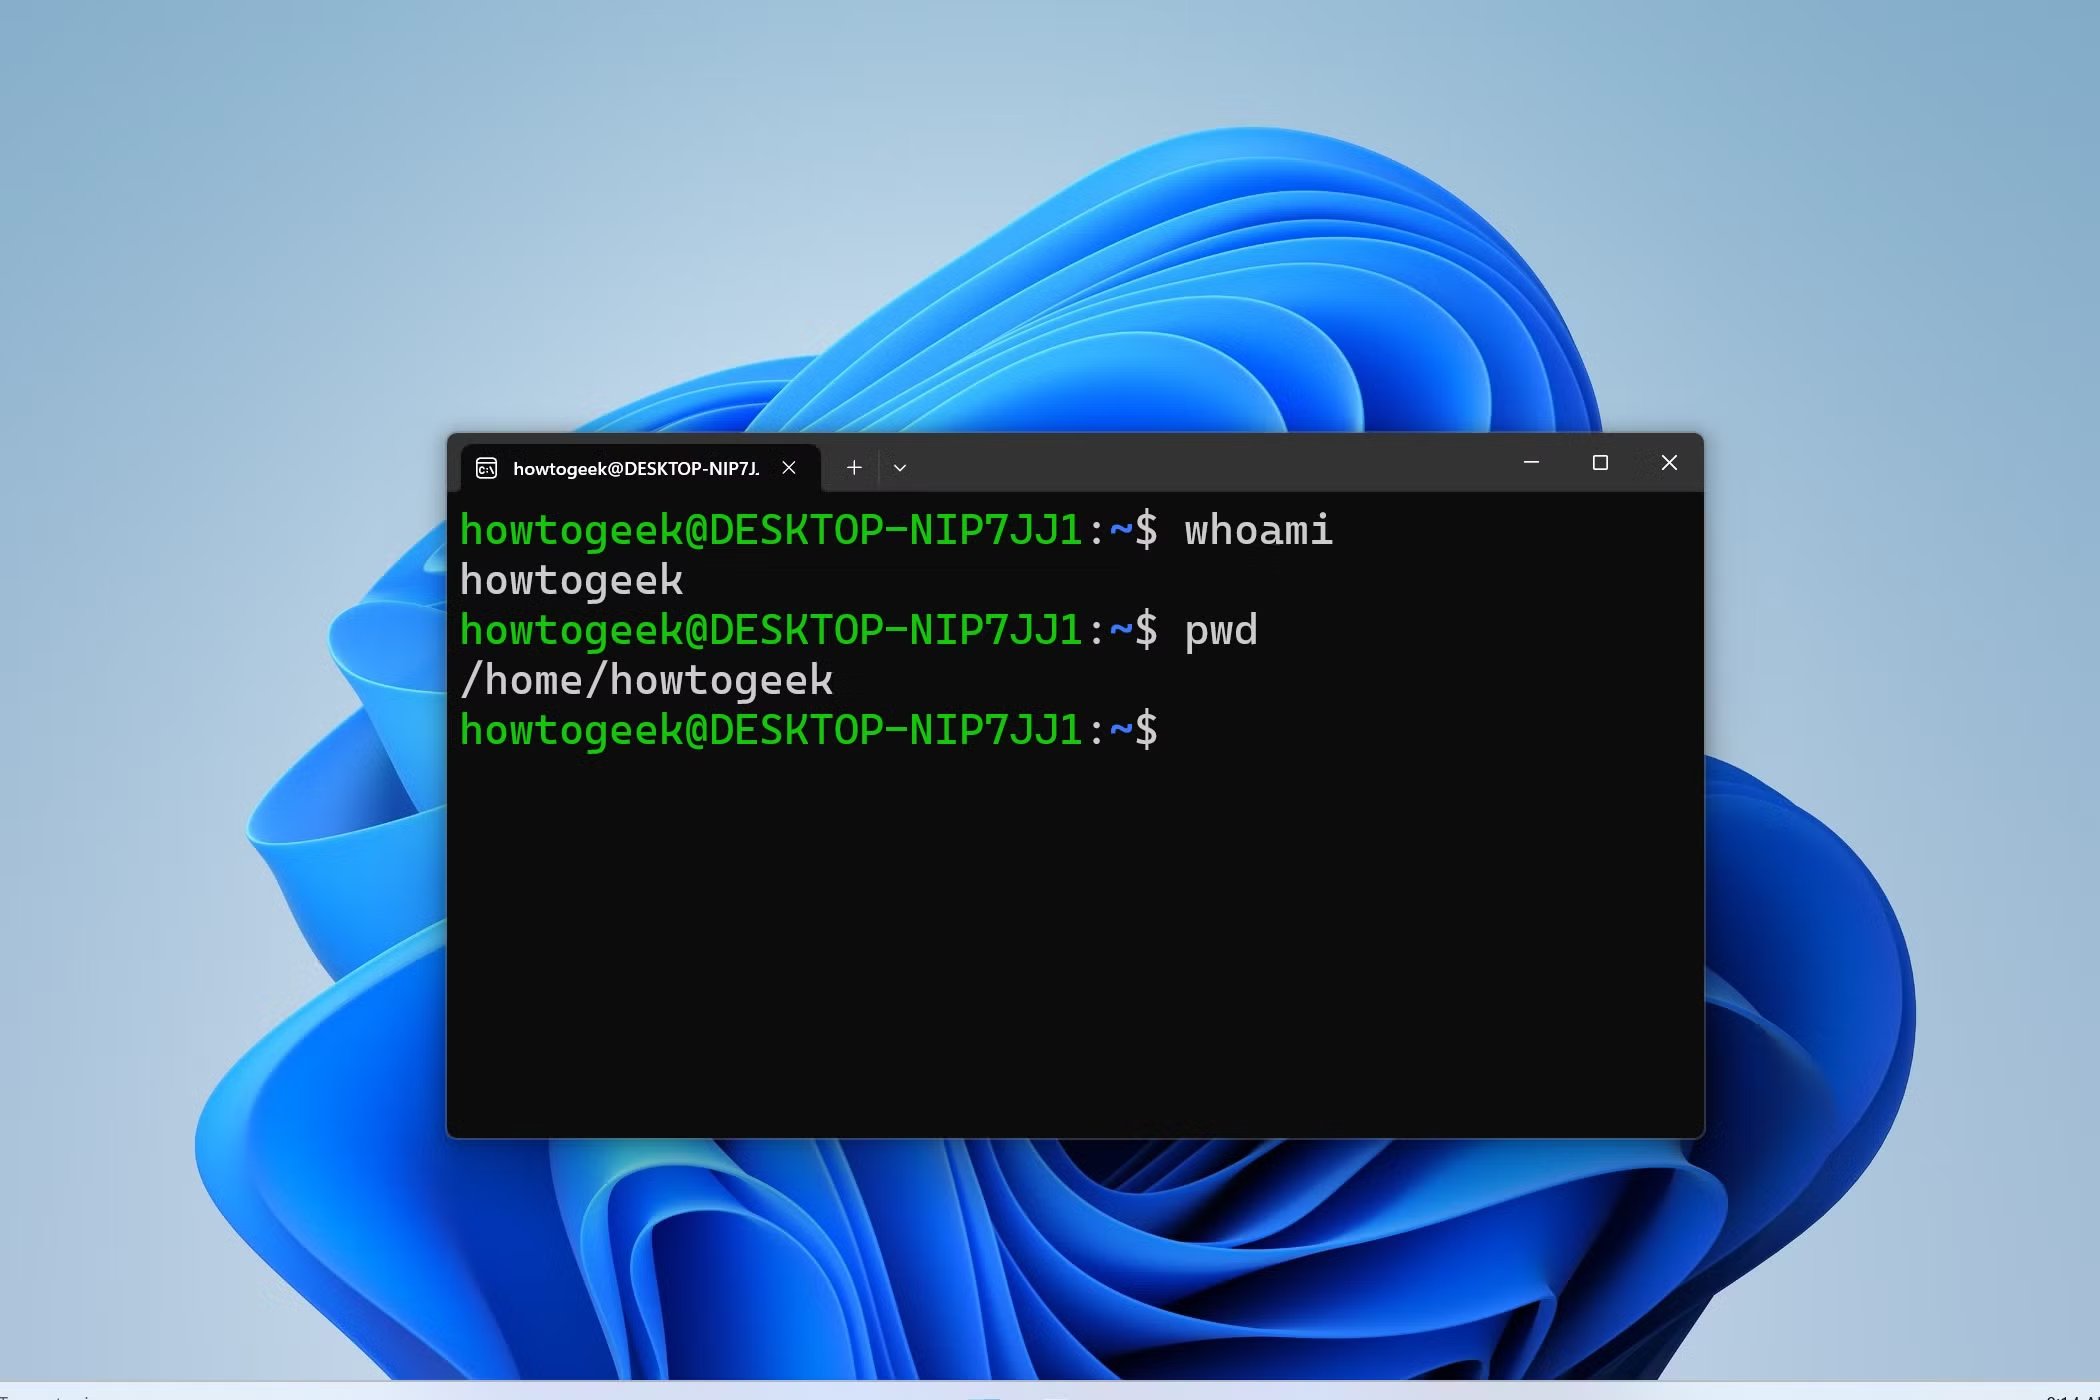
- The Linux Terminal: When you launch your Linux distribution, you will be presented with a terminal window (command line interface). This is where you will type Linux commands.
- Common Linux Commands: Here are some basic commands to get you started:
- ls: Lists the files and directories in the current directory.
- cd: Changes the current directory (e.g., cd /home/yourusername to go to your home directory).
- pwd: Prints the current working directory.
- mkdir: Creates a new directory (e.g., mkdir myproject).
- rm: Deletes files or directories (use with caution!).
- sudo: Executes commands with administrator privileges (you’ll be prompted for your Linux password).
- apt update: Updates the package lists for Debian-based distributions like Ubuntu.
- apt upgrade: Upgrades the installed packages on Debian-based distributions.
- yum update: Updates packages on Red Hat-based distributions like Fedora.
- Accessing Windows Files from Linux: WSL provides seamless access to your Windows file system. Your Windows drives are typically mounted under the /mnt directory in your Linux environment (e.g., your C drive will be accessible at /mnt/c). This allows you to work with files across both operating systems.
- Accessing Linux Files from Windows: You can also access your Linux file system from Windows. Open File Explorer and type \\wsl$ in the address bar. You will see your installed Linux distributions as network locations.
I often use WSL to run Linux-specific development tools and scripts directly from my Windows machine, making my workflow much more efficient.
Step 4: Choosing Between WSL 1 and WSL 2 (Windows 10 & 11)
As mentioned earlier, there are two versions of WSL:
- WSL 1: This was the original architecture. It provides a compatibility layer that allows Linux binaries to run on Windows. It has good interoperability with the Windows file system but can have performance limitations, especially with file I/O operations.
- WSL 2: This version uses a lightweight virtual machine to run a full Linux kernel. It offers significantly improved performance, especially for file system operations and running more complex Linux applications. WSL 2 is generally the recommended choice for most users in April 2025.
When you use the wsl –install command, it installs WSL 2 by default. If you installed WSL 1 manually, you can convert your distributions to WSL 2 using the following command in PowerShell (as Administrator):
wsl –set-version <distribution name> 2
Replace <distribution name> with the name of your installed Linux distribution (e.g., Ubuntu). You can check the version of your distributions with the command: wsl –list –verbose.
Step 5: Advanced WSL Usage and Tips (Windows 10 & 11)
As you become more comfortable with WSL, you can explore more advanced features:
- Running GUI Applications: WSL 2 supports running Linux GUI applications with the help of WSLg (Windows Subsystem for Linux GUI). This allows you to use graphical Linux tools directly on your Windows desktop.
- Networking: WSL shares the same network interface as your Windows host, allowing you to access network resources and run network services within your Linux environment.
- Docker Integration: WSL 2 integrates well with Docker Desktop, making it a popular choice for developers working with containerized applications.
- Customizing Your Linux Environment: You can customize your Linux distribution by installing additional packages, changing the shell, and configuring various settings, just like you would on a native Linux system.
- Uninstalling Linux Distributions: If you no longer need a particular Linux distribution, you can uninstall it by running the command in PowerShell (as Administrator): wsl –unregister <distribution name>.
I’ve found the ability to run GUI Linux applications directly on Windows through WSLg to be a game-changer for certain development workflows.
Step 6: Troubleshooting Common WSL Issues (Windows 10 & 11)
While WSL is generally reliable, you might occasionally encounter issues. Here are a few common problems and potential solutions:
- Installation Errors: Ensure your Windows version is compatible and that the Virtual Machine Platform feature is enabled if you are using WSL 2. Check the official Microsoft documentation for specific error messages.
- Slow Performance (WSL 1): If you are using WSL 1, consider converting to WSL 2 for significant performance improvements.
- Networking Issues: Ensure your Windows firewall is not blocking the network traffic for your WSL environment.
- File System Permissions: You might encounter permission issues when accessing Windows files from Linux or vice versa. Research Linux file permissions and how they interact with the Windows file system.
The official Microsoft WSL documentation is an excellent resource for troubleshooting and finding more detailed information.
My Personal Experience with WSL (April 2025)
WSL has become an integral part of my development workflow on Windows. The ability to seamlessly switch between Windows and Linux environments without the overhead of a full virtual machine is incredibly convenient. I primarily use WSL 2 for its performance benefits and have found it to be a stable and reliable platform for running various Linux tools and applications. The simplified installation process with the wsl –install command has made it even easier to get started.